

Who doesn’t want to capture potential customers from the internet? Today, we will learn a basic but extremely useful feature that lets you capture the leads you get on your business website in your Sugar automatically. This feature is commonly referred to as a ‘Web to lead form’ or ‘Web to lead capture’ in CRM jargon. Before we move on, let me clarify that this feature comes out of the box in Sugar and you do not need to purchase any additional SugarCRM plugins to get this functionality. I’m going to show you, in 5 extremely simple steps, How to Create a Web to Lead form in Sugar with screenshots and a video tutorial at the end.
For the purpose of this post, I’m going to show you the whole process using Sugar 7.8 Professional edition and a WordPress website. You can use the same method to create a web to lead form in the SugarCRM Community Edition.
So let’s begin!
5 easy steps to create the web to lead form in SugarCRM
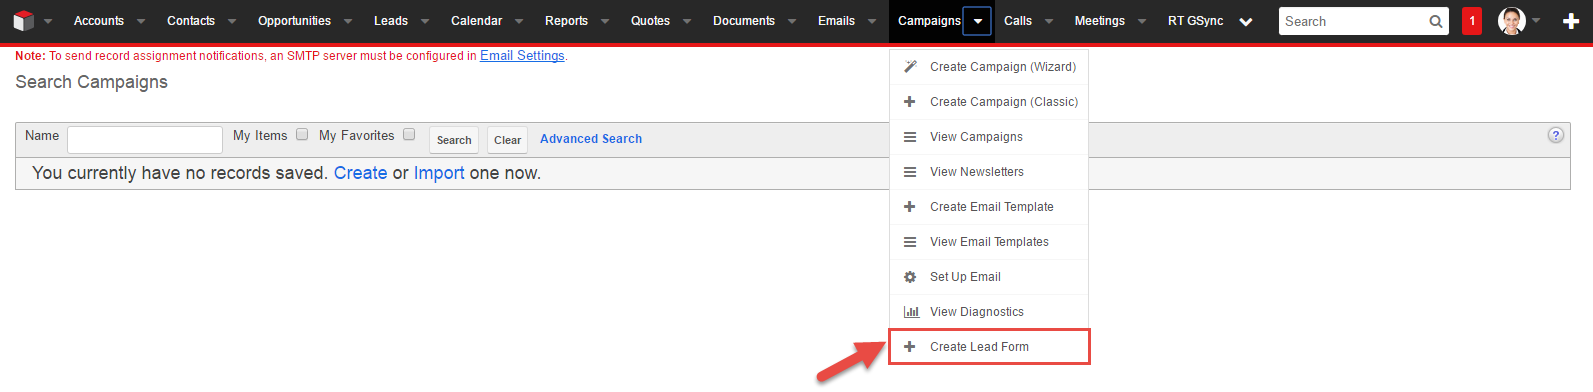
Step 1: Click on the Campaigns Module and select “Create Lead Form”
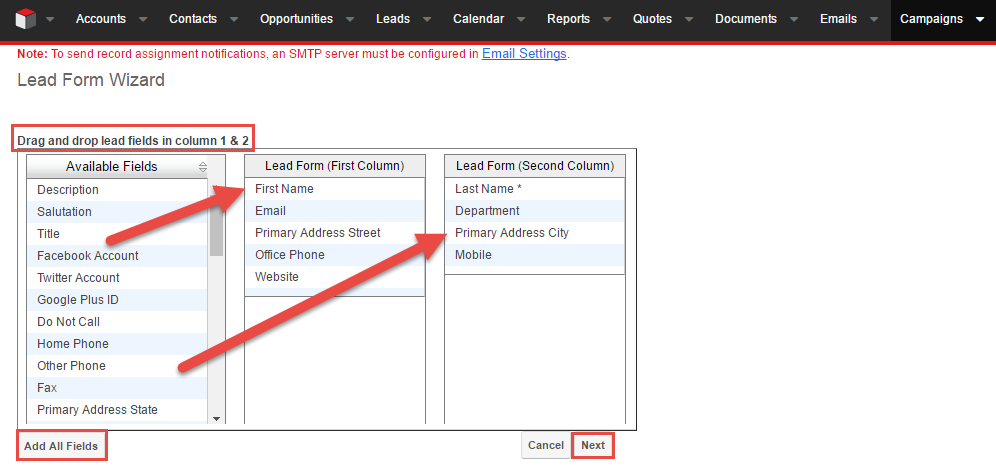
Step 2: Drag and drop all the fields that you require in the Contact Form
Once you click on the “create lead form” you will be prompted to a lead form wizard which will let you drag and drop the form fields that you want in your website’s contact form. Here, you can select all the relevant information fields that your sales team requires about a particular lead to mature it.
For example, some firms like to keep it simple and use only the last name and the email address. Others need detailed information to mature the leads so they use multiple information fields in their contact form. Tip: The simpler it is, the more people are likely to fill it up.
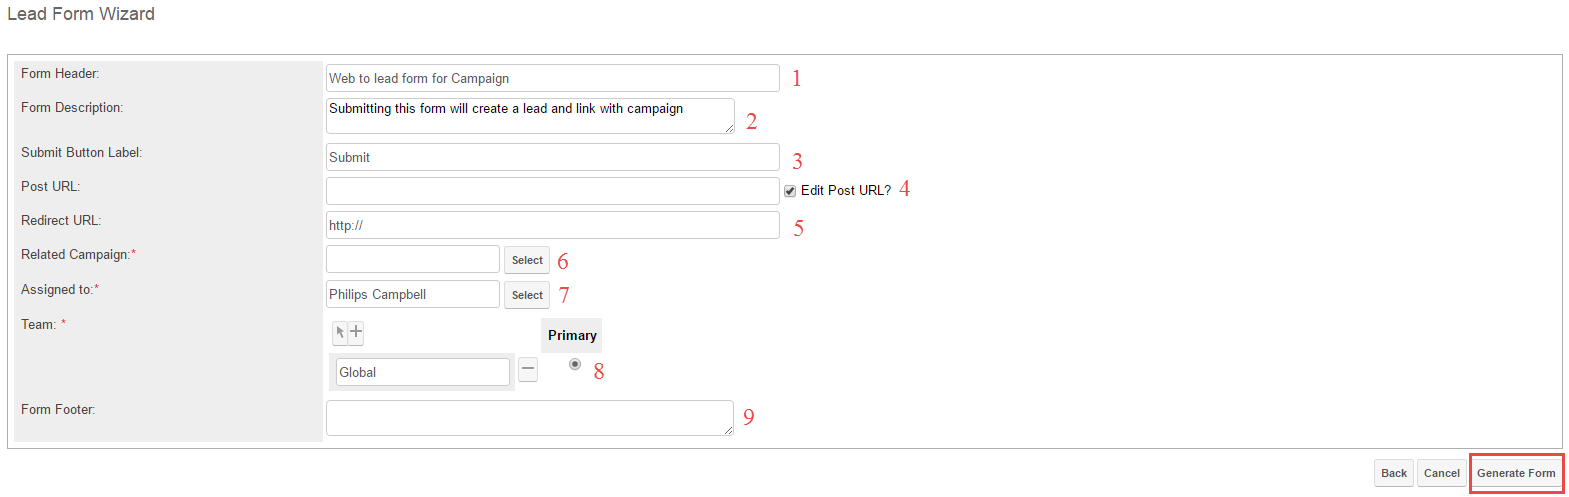
Step 3: Fill out the relevant information in the Wizard
Filling out this information is very intuitive. Given below is a description of the nine fields to be filled.
Refer to the pointers below if you get stuck filling in the form, otherwise, continue on to the next step.
1: Add the header that you want to appear on top of your contact us form. The possible header can be “Contact our team” or “Say Hello!” etc. You can also remove the header altogether.
2: Add a short description that you want to appear below the header. You can remove it if you desire.
3: Give a name to the “Submit” button. Possible labels are “Get in touch”, “Send” or “Post”.
4: Add the URL of your SugarCRM instance. This is basically the URL on which the lead information from the contact form will be sent to. By default, it is pre-filled with your Sugar instance URL.
5: This is the URL of your ‘Thank You Page’ or any other page that you want to redirect the user to once the form has been successfully submitted.
6: If you are running a marketing campaign of which this lead capturing is a part of, select that campaign. Without selecting a campaign, you cannot proceed further.
7: Select the CRM user to whom you want to assign the lead. By default, it is assigned to the user who is generating the form.
8: Add ‘teams’ who can view the leads captured through this form. You can add multiple teams.
9: If you want any text to show above the “Submit” button, you can enter it here.
Step 4: Click on ‘Generate Form”
Once you click on the “Generate Form” button, Sugar will generate the HTML code for you and show you a preview of your contact form. Here, you can make changes to your form’s layout, add text and images, etc. You can also edit the HTML here.
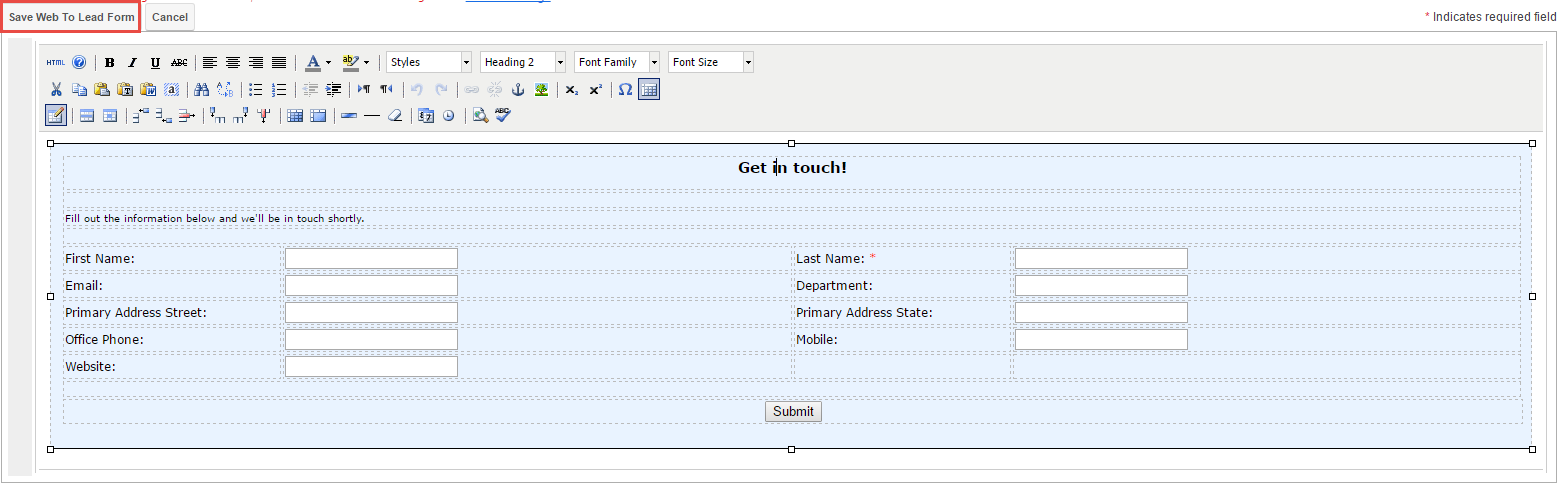
Step 5: Click on “Save Web to Lead Form”
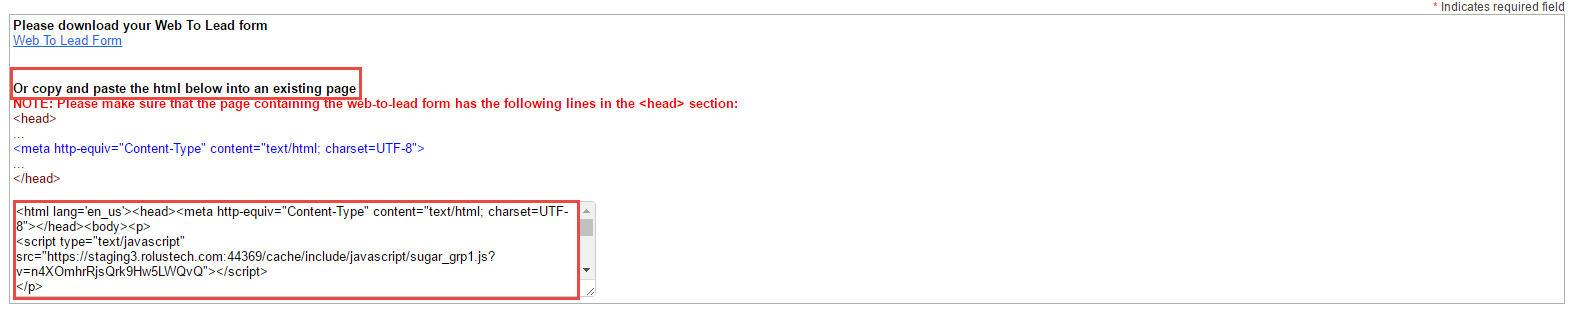
This will take you to a final screen where you can download the HTML code or simply copy it to paste it on your website.
…And you’re done!
Congratulations! You have successfully generated your web to lead form. Refer to the sections below if you need assistance on how to post the web to lead form on your website and start capturing leads in SugarCRM. You can also see a video tutorial of the process below.
How to Post this form on a WordPress Website
Simply log in to your WordPress website and follow these steps:
Step 1: Open the page on which you want the form to appear. If you want it on a new page use the “Add New” option.
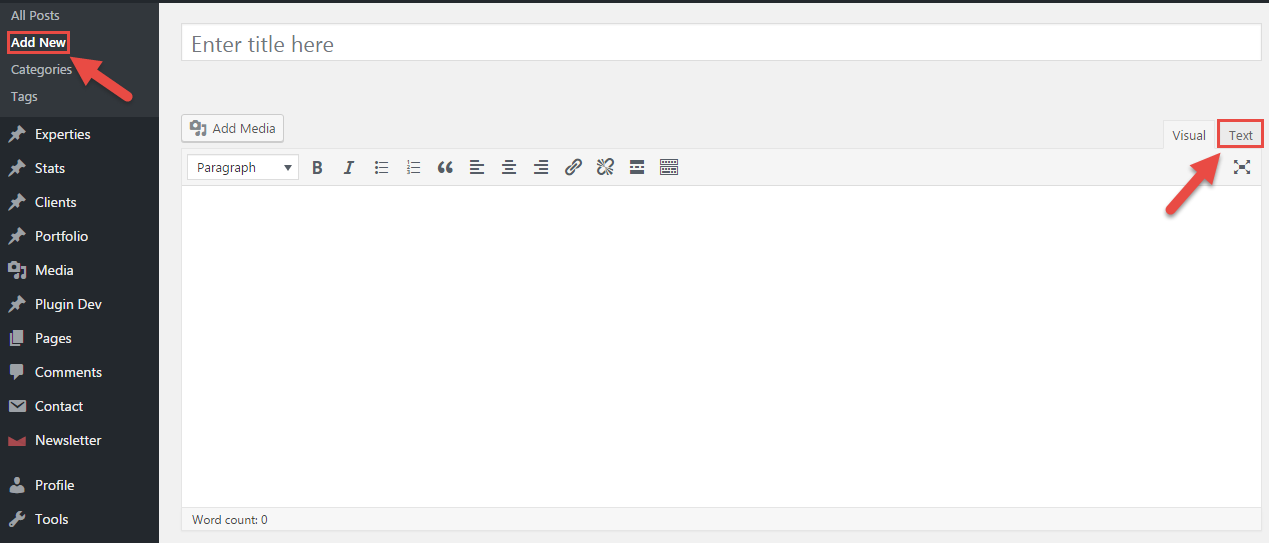
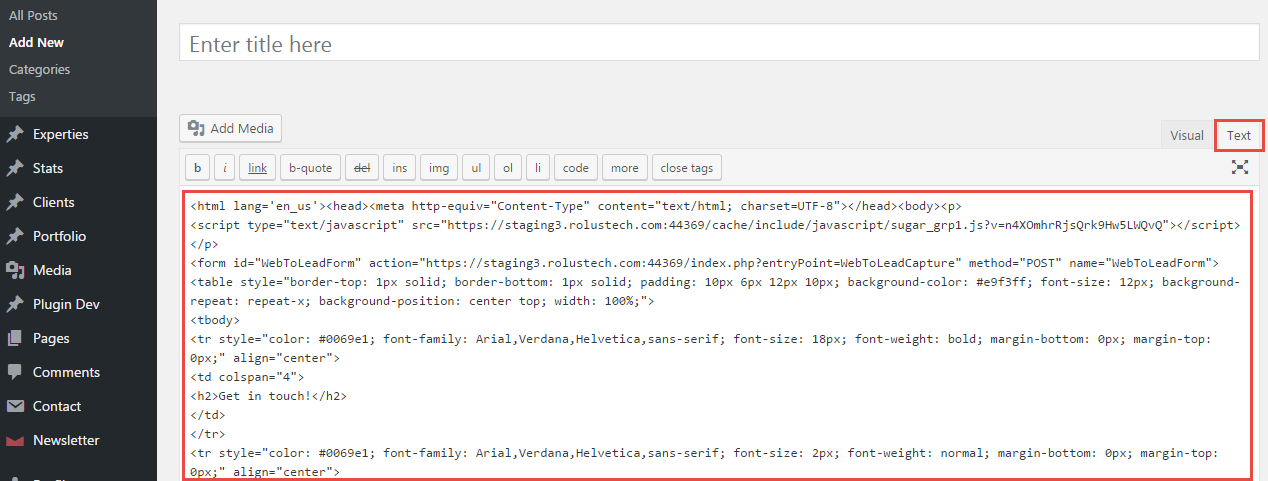
Step 2: Go to the “Text” Panel and Paste the HTML code there.
Step 3: Make any required changes and “Publish” the page.
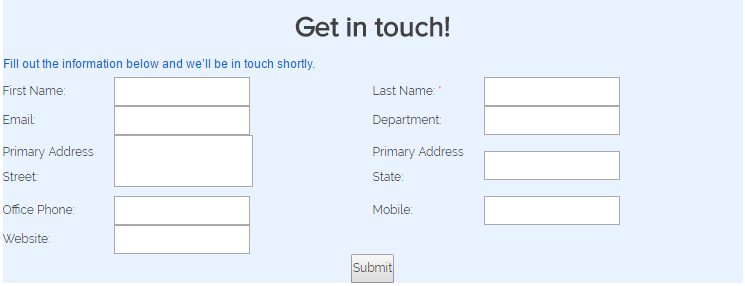
This is how it will appear on your page. You can make all the necessary changes beforehand to make it visually appealing and fit your website’s existing design layout.
Video Tutorial: How to Create a Web to Lead Form in SugarCRM
Bottom line:
Needless to reiterate, by creating this web to lead form, you can easily Capture Leads in Sugar from your website and have them automatically assigned to your sales rep who can start working on maturing the lead as soon as it enters the system. This is, by far, one of the most effective ways to automate the lead capturing process. What is even more efficient is integrating your whole website with SugarCRM to operate your complete business from a single unified platform.
Rolustech is a SugarCRM Certified Developer & Partner Firm. We have helped more than 600 firms with various SugarCRM Customization and Integration. Get in touch today for your FREE Business Analysis. We will be happy to assist you!

